Showing posts with label projects. Show all posts

3/20/2012

The Island of Misfit Keys

This is a really simple project, so simple that it's almost not worth blogging about... but it's amazing what a few dollars and a few minutes can do to ease your mind!  EVERYONE should do this!  Every year that passes is just another key to forget the purpose of.  

It makes me think of my grandparents' kitchen.  I always wondered why my grandmother would write the date on things with a wax pencil... how could you forget when you got something, or have it and not use it for long enough that it would go bad?  Well, I found out when I was helping her after my grandfather died.  In 2006, I was finding things in the pantry that were marked as early as 1992.  Turns out that when you're busy and things are around you long enough, you forgot when you got them and what you got them for.  There was even a bottle of liquor in a cupboard in the laundry room marked "opened April 1974"


This little project started when I accidentally broke a window pane in our side door (which we never use) and proceeded to tear through the junk/key drawer and laundry room looking for the keys to it... with no luck.  And to top it off, they were keys to a deadbolt which we had just installed a couple of months before, so I knew they were around somewhere!  I did manage to find the keys within a few days and they happened to be safety pinned to our spare house key (I'm always putting things in "safe" places, never to be found again).  

It got me thinking though... how long will I remember that the little keys on the piece of molding on the shelf by the phone belong to our storm door?  Or that the keys attached to the yellow springy bracelet thing are for my grandmother's apartment (note that those were still in the drawer even though she died two years ago)?

Enough is enough!  I decided it was high time to label every single key that we have and know the use for and toss the ones that we know for sure don't go to anything anymore.  

I whipped out my trusty label maker and hit up the local hardware store for a bunch of fun colored plastic key chains.


colorful organization things + labelmaker = YAY FUN!!!!

As usual, I got caught up in the project and only took the "after" photo!  We threw out lots of keys, including keys for a car we don't have anymore, my deceased grandmother's apartment keys, old work keys, places we don't live anymore, etc...   but naturally it couldn't be that simple because there are still a number of mystery keys that we weren't totally sure about and weren't ready to trash.  So for now there's a zip baggie labeled "keys I think are trash, 2012."  


The rest got labeled (there are WAY more than in these photos).  It took about 15 minutes and I bought a couple dozen of the plastic key labels for less than $10... time and money well spent!  

3/18/2012

semi-DIY picture framing

A few weeks ago, I started looking around the house at all the unframed art we have.  This particular poster has been sitting on top of books in the office for as long as I remember which is a shame because it's really cool!  I decided it was high time to put it in a frame, but since I'd just taken three of my grandmother's watercolor paintings to a proper frame shop (and paid the ouchie price), I wanted to find a cheaper option.  

It's an odd size, so buying a readymade frame wasn't an option.  I headed to Jerry's Artarama to see the frame pieces that you buy and assemble yourself.  They've got four frame styles and then you just choose the dimensions.  I did have the frame person at Jerry's cut the mat for me (about $14) and then I bought the 13" and 28" frame segments and the offset clips.  It was so easy to put together!

You just tap the piece of plastic into place with hammer!

Next, lay everything inside the frame (note: I have foamcore and the extra practice mat behind the picture)


I got 1/2" offset clips (the largest they had) and they weren't deep enough, so I stacked squares cut from extra mat board to make up the difference.  I drilled pilot holes, then screwed the clips in place


Looking good!  I cut a bit of the mat board out to go around the monkey's foot... this is why there's a practice one behind the picture - it didn't go well the first time!

1/30/2012

Fun with Storm Windows

I've been watching the water run down the windows in my sewing room on particularly cold winter mornings for a while now.  It's starting to damage the paint and it looks like some mold spores are setting up shop.  Mysteriously, all of the other windows in the house have storms except for these two, and it doesn't help that they're single pane windows.

*Very Important*  Condensation on windows doesn't mean that there's something wrong with your windows or that they need to be replaced... it's just got to do with the relative humidity in the house and the temperature outside the house.  What you need is a good storm window, not a new window.  The whole new window industry is such a scam, but that's a rant for another day.  If you're interested in why it's more earth friendly to keep your old windows (and who doesn't want great reasons to save tens of thousands of dollars), read this article.

this actually isn't even that bad


the condensation is making the window frame very sad

In the interest of preserving our original wood windows, I decided that something had to be done!  I have a 3-fold plan of attack to combat the water in my house- storm windows, vapor barrier in the crawlspace, and install a bathroom exhaust fan.  Items 2 and 3 are pretty involved, so naturally I decided to work on the storm windows first.

I wasted nearly a whole day coming up with a plan.  I searched online trying to figure out how to replicate the storms on the other awning windows on our house - which are simply a piece of glass framed in aluminum and held in place by the tension of two screws in the window molding.  I even called a glass shop in the area and was told that "we don't do anything like that".  Seriously people?  You can't do piece of glass with the edge wrapped in metal and you call yourselves a glass shop?  

I sent an email to another glass shop and then headed off to the big box hardware store to see what I could find.  The nice store clerk back in the window/door section helped price a custom storm (hard to find without sashes or screens!) and then sent me home to take measurements.  

I headed home to take measurements and realized that standard exterior storms wouldn't work because there are two windows together and the molding is narrow and funny.  Argh!  Finally, at this point, I decided that I should stop fixating on recreating the existing storms on our other awning windows and start focusing on new solutions that will work just as well.

Starting back at zero.  I look around some more online and see that for historic houses (like Victorians and other with really fancy and special windows) people seem to recommend interior storm windows because it doesn't detract from the fancy windows.  Interior storms, you say?  Then I wouldn't have to get up on a ladder with a screw gun!

I found the website of a guy in New Hampshire who makes interior storm windows.  I called to ask about them and he said that they do help with condensation.  He said that he wouldn't make them for me because I lived too far away, but that it would be easy for me to make myself.  They're basically a sheet of acrylic framed out and edged with weatherstripping.  You place it in inside of your window frame and it stays in place with the tension of the weatherstripping.

Sounds like a fun project!

the initial sketch and dimensions


being tough and manly, cutting the miters by hand

 the acrylic (cut to size at the store) and the two horizontal trim pieces

here's where I lose my carpenter cred - I have to confess that the squiggly line is liquid nails adhesive

*very important*  measure your diagonals because it can look square and have the miters line up, but not actually be square... and it would be very hard to fit a trapezoid into a rectangular window opening ; )

The liquid nails goo was fun to put down and worked perfectly fine.  If I'd been patient enough for my dad to get back to town, he could have cut dados into the molding for the acrylic to sit in which would have been much classier.  But I was impatient excited and wanted to do the project immediately!


Rats!  My first acrylic window was about 1/8" too wide for the opening... so I temporarily moved the weatherstripping to the outside on that piece to keep it airtight.  I imagine that using a putty knife whilst cursing a little will work wonders for jamming that weatherstripping in - if not, I'll sand the side of the molding to fix it.

The other window fit PERFECTLY!!

BEAUTIFUL!  Now, if only the foamy weatherstripping came in white *sigh* (and some caulk in the miter joints and a coat of glossy white wouldn't hurt)
  

Overall, I'm so pleased with how the interior storms turned out (despite the hiccup with the first one).  There's no more water running down the windows!  It was a really easy project.  The hardest part was dealing with the measurements because every 1/8" counts when you're compression fitting something in.   I highly recommend it if you've got a condensation problem.  The estimate I got for purchased ones was $89 per window and I spent around $30 per window on the ones I made.  Acrylic is the single biggest cost, at $15 per sheet for the size I needed.  A few strips of wood molding, tube of liquid nails, and two packages of weather stripping made up the rest of the cost 

Naturally, doing one project tends to create others... as you can see, we never got around to painting the window trim white.  Now that my new white window frames are in there, the cream is looking pretty yucky!  When my husband bought the house, everything in the house, and I mean EVERYTHING was that dirty old flat cream paint - we're talking walls, trim, doors, AND ceiling!  We've been steadily painting the ceilings white and the walls different colors but we haven't made it all the way around the house with the trim yet.


11/15/2011

A cheerful to-do board

I like LOVE lists!  I have a marker board on the wall in the hall that's a collage of lists.  I use a different color marker for one and they each start in their own little corner.  House projects, craft projects, groceries, errands, wish list, things to look up later... you name it and I've probably got a list for it.  I was inspired to combine my love for lists with my perpetual desire for a healthier and more organized life and made this totally cute to-do board.

Last year, a friend and I were talking about making permanent habits out of things we'd like to do (and should be doing) everyday... things like taking vitamins, flossing teeth (which has been a daily habit of mine for over 3 years now!), exercising, eating vegetables, etc...  basic things that a normal healthy productive adult should do anyways.

Some of us like to have lists to help accomplish goals, and so recently I decided to put a life tasks list on the wall too.  I chose a mildly embarrassing assortment of healthy habits and chores (I don't really plan on cleaning the bathroom and vacuuming every single day), and some like no tv and being in bed by midnight are just hopeful goals I rarely check off.

I spray painted a frame glossy white, placed some cute scrapbook paper inside, and drew an analog excel spreadsheet on it with a sharpie and a ruler.  Dry erase markers work on glass, and when you erase (gently) the sharpie stays behind.


I used 1" painters tape to edge the glass insert, freehanded straight(ish) lines with a sharpie and a cardstock home store coupon (quicker than finding a ruler), then wrote out a list


The painter's tape left a perfect little border

Now, when I do something as simple as walking the dog, I get to put a little check in a box.  Yippee!   I'm all set to improve my life with one checkbox at a time!


11/11/2011

Crafting in Boston

I used to envision getting loads of things done on my trips but eventually gave up on that, realizing that I'm much happier to spend my time walking around a city figuring out what makes it tick and how it got to be the way it is today than I am to sit around the hotel room working on crafts waiting for my husband to get off work.

I spent a whole month in Boston this summer and when I was packing, I thought I ought to try bringing along a couple of projects in the hopes that I'd get something productive accomplished, being away from the distractions of home.  I decided to work on a smocked dress for my friend's new baby girl and went off to my local heirloom sewing type fabric store to get a few fabric options pleated.

The first week of Boston, I found Grey's Fabrics, a cute local store that was a short bus ride (or a long walk) away down in the South End.  Grey's specializes in cottons with really interesting and unique prints.  There were some neat retro designs and a lot of feed sack cloth reproduction prints.


I decided to sign up for a couple of classes for the camaraderie and fun of doing a project that someone else comes up (I did feel a little silly paying for easy sewing classes when I'm sort of a professional seamstress).  I picked the dog leash class and the tie class, easy projects with instant gratification!  Even though they weren't groundbreaking projects, I had a blast and got a little of my years long sewing burn-out worn off.


I like the soft aqua pattern of the outside and I like the orange reproduction feed sack fabric lining even more!


Another great reproduction feed sack fabric!  It's so pretty I hate to use the leash and dirty it!


I also learned that she rents time at the machines for a few bucks an hour and was excited to be able to come in and work on my little dress.  Even better is that I learned they had sewing evenings every Wednesday where people would come and drink wine and work on their own projects.  I was able to finish my two little dresses during the sewing evenings I attended and had a great time doing it.  I'd love to start something like that with my friends at home!

 One of the adorable vintage machines in the sewing area.  I used Beatrix most of the times I came in to sew.


The smocked dress I made for baby Hazel turned out beautifully.  I wish I could finish every project I start in under two weeks!  I finished it so quickly that the dress only just now fits her and she's had it since July!  The nice thing about babies is that if you make it too big, eventually they'll grow into it : )

 The smocking panel in progress (almost done actually)


All finished!  I designed the smocking plate myself, though it's hardly anything groundbreaking... there are diamonds and hearts in lots of plates!  Coming up with the design and picking floss colors are really the hardest part about smocking.


On a hanger for scale reference... it's a tiny dress!  There are matching tiny bloomers too (not pictured)


After finishing the purple dress for Hazel, I was on a roll, so for the last sewing evening at Grey's, I whipped up this one for another friend's baby with a cute fabric they had on sale.


6/26/2011

Catching Up: Projects

It's been a month since I last posted anything... time to start catching up!  I've been to Vermont, Connecticut, back home for a couple of weeks, and now I'm midway through my monthlong stay in Boston.  With so much going on, I think I'll break it down and do a few catch up posts.

I haven't done a whole lot of projects, so I'll add in some pictures of my flowers and new garden! 


I finally finished the "wallpaper" backsplash which needed to be done after the cabinet/fridge switcharoo left that wall piece exposed.  Also up for admiration is the new shelf above the stove.


I had to replace the old shelf because it wasn't long enough to reach the cabinet we hung (remember the fridge used to be there).  It went to good use though, we cut a piece off to fill the gap between the two cabinets (you can barely see it in the first picture.  I couldn't decide how I wanted the new shelf to look, and eventually decided to roll with my inspiration to match the wooden piece I used for the dog bowl stand.  I painted the exposed wood wall behind it, and voila!  
Welcome to the ice cream parlor.  I love it!


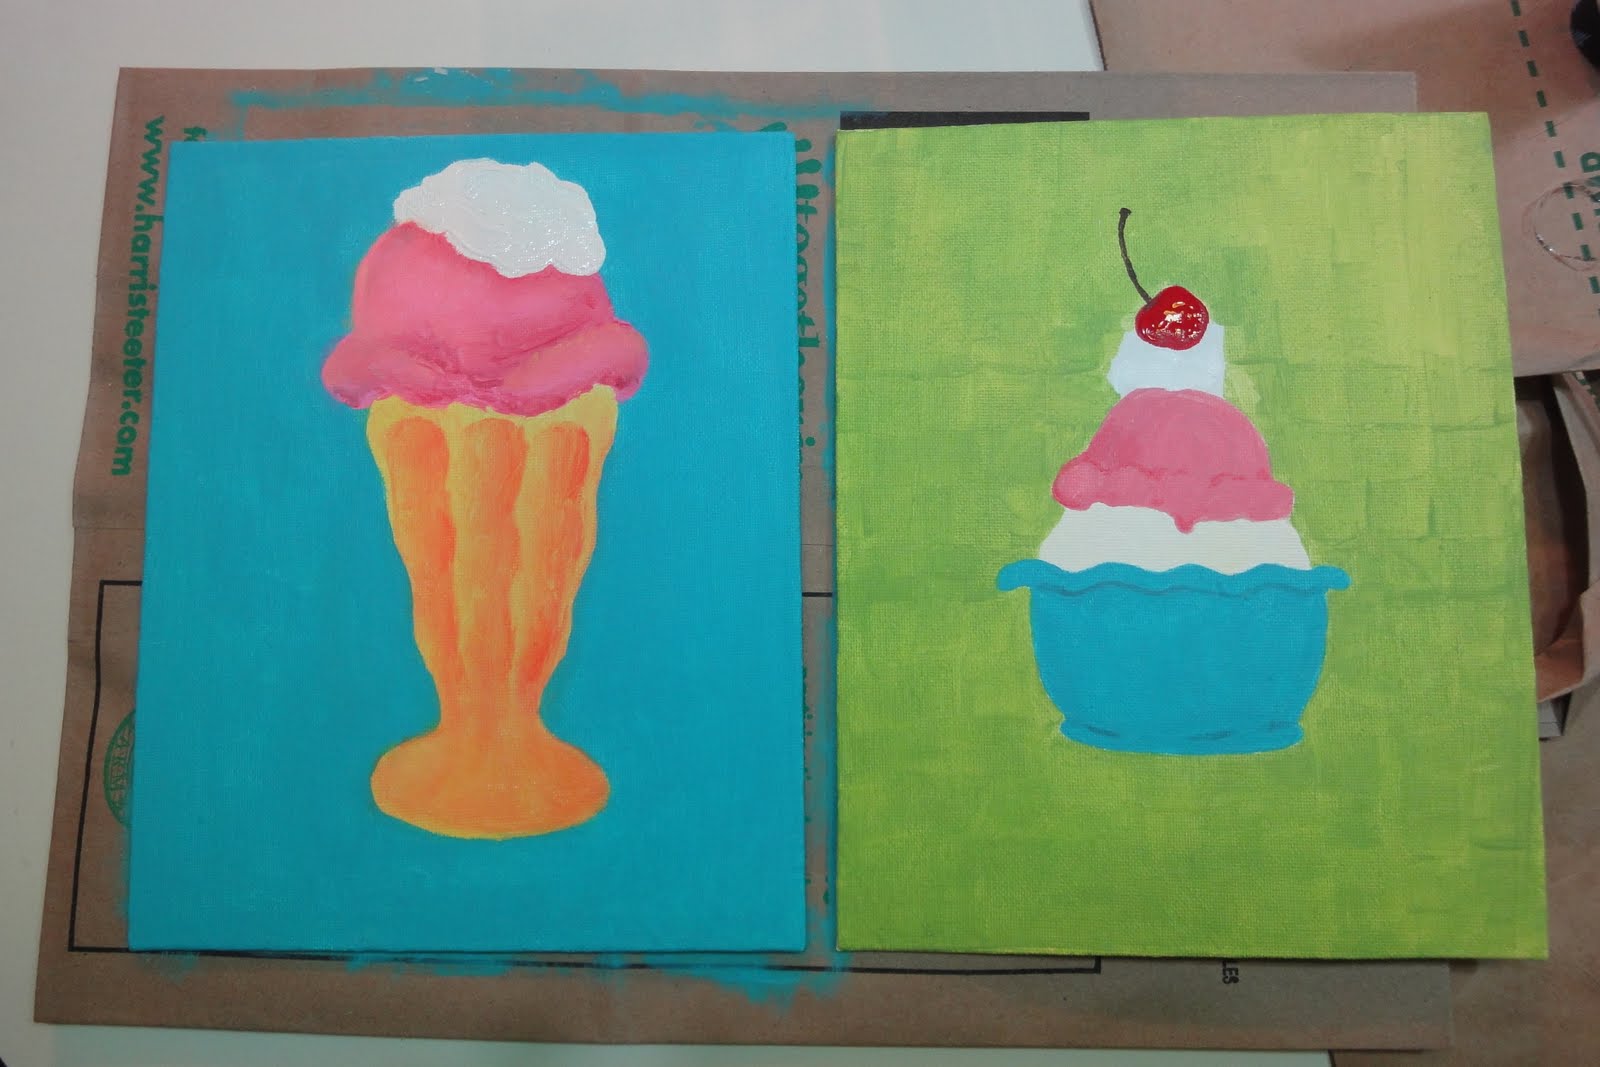
Speaking of ice cream parlors, a friend and I were inspired to paint little pop art ice creams to hang in the kitchen above the hallway door... these two are in progress, we still have to put on the finishing touches and paint the third canvas.  Mine is the one with the blue background - I still have to add the cherry!  We had a great time painting.  The project started around 11pm and while I swear no alcohol or drugs were involved, we ate tacos, mini pizzas, and other munchies as we painted until we looked at the clock and saw 3am!  Hence, the missing cherry and unfinished whipped cream!


Before the great drive to VT, I made these two little sundresses for my friend's baby.  Naturally, I do lots of things backwards... notice how one pair of straps buttons inside and the other buttons on top.  These are great little dresses to throw on a kid.  They stitch up quickly too since it's one piece! 


As of June 7th, the butterfly bushes are blooming, the cosmos are coming up,  canna lilies are up, zinnias are on their way, and the redbud tree finally has its leaves.  Before I left for my month in Boston, I was frantically trying to lay out an irrigation system on my 3 main flower beds.  I got 135' of drip hoses and am hoping for the best.  I will be so excited to see how everything looks when I get back in July!


My next door neighbor has the most lush, plant filled yard.  It's truly enviable.  He's always trying to give me plants and it's awesome!  Except when I'm about to be gone for 8 weeks during the hot dry summer! I told him in no uncertain terms that while I was really excited about doing a garden, it just wouldn't be a good idea since I wouldn't be around to take care of the plants.  Within 30 minutes, he had brought over 3 tomato and 4 pepper plants and they were in the ground.  I also finally installed the trellises and planted the morning glory seedlings that I had started a couple of months before.  Also in the leftover and neglected seedling tray were a number of shasta daisies which I planted too.  As if that weren't enough, I figured since I had a garden started, and our friend/housesitter would be watering it anways, I might as well throw in my seed packets... nothing to lose!  However - if it works out, it will be a SUPER crowded garden - I put in a pack of zuccini seeds, a pack of corn, and a pack of pumpkin seeds.  


Here's one of the morning glory babies as of June 7.  I'm hoping that by the time I get home, they'll be all over the trellis!

5/15/2011

rain, rain... do I want you to go or stay?

We're in the midst of a very rainy week.  I am so happy for that because of all of the plants I have recently planted... we need the water when we can get it before we head full on into the hot dry summer!  On the other hand, I'm having a personal problem this week with a leaky pipe in the kitchen wall and trying to dry out the crawlspace and subfloor is harder when it's raining!

You can't even imagine the feeling of minding your own business on the back patio painting some shelves and suddenly seeing water come pouring out of the bricks on the side of your house!  It was absolutely crazy seeing the house peeing.  Luckily I knew immediately that it was the drainage pipe for the dishwasher and kitchen sink because the dishwasher was mid-cycle, so there wasn't an emergency need for a plumber.  I just stopped using them until the plumber came in the morning.  I have no idea how long the leaking has been going on - I'm not often washing dishes while standing on the back patio.  It's a small miracle that I happened to be there to find out what's been going on!

There are a few wet floor joists and wet subfloor under the kitchen, but it only spans 3 joists and comes out about 2' from the wall - not a huge area.  We set up my dad's dehumidifier in the crawlspace and now I get to attend to the pleasurable task of going down there 3x daily to empty it!  I'm thankful that our crawlspace is around 3' high, much better than a lot of them.  I'm also glad that this was an exterior wall on a brick house that's 1 story.  It's like the least damaging scenario for a big water leak!


fun video clip of the new water feature on the back of our house!


Before the plumbing excitement, I was doing more interesting things...

Project:  Dog Bowl Cover - age 3ish years?

Our dog has occasionally gotten his collar tags stuck in the metal frame of his dog bowl holder.  I've had a yucky towel laying over the frame for a couple of years now to prevent that from happening, and I finally decided to make a proper top. 

The new wooden cover was outside while the paint dried and somehow in the 4 hours that the dog bowl frame was not protected by anything he managed to completely upend it.  I have seen this happen a few times and it's crazy - and really upsetting to our dog when he ends up wearing the frame as a necklace!  I was out to dinner and found this scene when I got home.  I have no idea how he managed to get one bowl perfectly inside the other.


The new frame.  It's so cute looking because I used the spray paint left over from our wedding table numbers!  I was very proud of my jigsaw skills.  Very disappointed that my screw for the underneath support very nearly popped through (you can see it in the front part).  Maybe if we got around to organizing the tools better (or at least into one location) I'd have used the proper length screws instead of scrounging up the least inappropriately sized screws I could find.


The new frame cover in action.  Tommy is looking on approvingly, wondering why it has taken years to make this happen!  The water bowl is too big because it pre-dates our frame.  After this photo, I finally went to the pet store and got a bowl that is the right size so the cats would quit sloshing it around when they lean on it.

If you think this is cute, wait till you see the shelf I made for above the stove!

5/09/2011

project: shed - continued

We had another beautiful day so I spent most of it outside working on the shed.  Yesterday, I got it all prepped for paint so I was ready to go this morning!  Despite forgetting to bring my paint swatch with me, I did get the right paint color on my shopping trip this morning.

In the interest of full disclosure, I have to admit that I have only painted the half of the shed that we can see.  The back and other side are on hold because of all the vegetation and fallen limbs back there.  It would be another big project just to gain enough access to pressure wash and paint!  I might do that in the fall.

This is how the shed looked on April 7th, with falling shutters and gigantic boxwoods.


The tree guys came on April 8 to take down the two aged redbuds and take out the boxwoods in front of the shed... a great improvement - sort of - now you can really see how crap our shed looks!


This morning's fresh coat of the top strength primer that Kilz had to offer.  It's looking good already!


I love the new color!  I still have to do the second coat, but here's a peek at the new look.  I'm not planning to put shutters back up because non-functional shutters that are just screwed to siding make me twitchy.  Especially when they clearly aren't sized to even pretend to cover the window!  


Instead, I'm going to get a trellis for each side of the window so that I can grow some peas and morning glory flowers up it and I plan to paint the trellis to match the door.  I'm also going to make a flower box for under the window and paint it to match the door.  I've had this idea of making a garden in the now empty space in front of the shed... we'll see how quickly that happens!

Most importantly, here's a photo of the beautiful flowers that Bob sent for Mother's Day.  True, I'm not a mother to human babies but we have 3 furry babies that I take care of!  I'm also taking the opportunity to show off our cool couch and the wall installation I did this winter!


These are the very lovely farmers market flowers that my mom brought over for the Mother's Day brunch I had for her and my mother in law.


4/09/2011

Yay for the TreeMan!

I got up early thinking it would be a nice relaxing ho-hum day at home.  I'm feeling mostly better except for pain in my wrists and hands (which is better than yesterday, so that's great!)  The day turned out to be far from ho-hum though!

I picked up some sub work at the ballet this weekend, so that will be two shows Saturday and one show Sunday.  I feel pretty good about going to work for a couple of days and am desperately hoping that my hands feel normal tomorrow.  Luckily there isn't really any shoe tying or buckling during ballet costume changes, so I should be ok with my sub-optimal fine motor skills.

I spent the morning looking around online at area rugs.  Our beloved dog Tommy is getting older and HATES to walk on hardwood floors.  I got a runner for the hallway a few months ago and he's finally deemed it safe to walk on.  He decided to sleep on our bedroom floor last night (which only happens about 3 times a year and usually just during a storm) so now I'm thinking again about getting an area rug for the bedroom floor so that he'll feel safer and more welcome.  I found an option from FLOR that I'm really excited about!  I don't need a rug quite that big but I love the shape and I could cut it myself out of an area made of fewer tiles.  I feel like this rug has a slim to none "husband approval" chance but I went ahead and ordered a few swatches to look at, so we'll see.  Did I mention that the swatches are pink?  Pink is the new black, it looks good with every other color, even orange which is the color of our bedroom!

I also started tearing apart the cushions on the patio furniture so I could soak the foam parts in bleach.  They're ugly and I want to make new covers for the foam inside them (which is about as gross looking as the chair seat in the before photo.)  I also tried cleaning one of the chairs and it turned out really well!


before


after... like brand new!


Towards the end of the outdoor furniture / bleach project, the TreeMan called and said he could come over in a couple of hours because of a cancellation this afternoon!  This was VERY EXCITING because he just did the estimate yesterday afternoon and said it would probably be a couple of weeks.  He knew I was eager to get the gnarled redbud down while the cherry tree was still blooming, so he snuck us into the schedule when they got the opening!

The guys took out the 2 gnarled old dying redbud trees, all the Bradford Pear babies behind the fence, a fully grown Bradford Pear baby on the side of the yard, 3 GIANT overgrown boxwoods in front of the shed, and the saplings by the house.  (for those not in the know, Bradford Pear trees have pretty but stinky flowers, the bastard spawn of Bradford Pear trees do not flower and are pokey with thorn type protrusions on the branches)


before - with the 2 extra large rotting redbud trees in the foreground


after - what a great view!


The redbud trees were dying and hollow inside!  Good thing we took them down!


shed before... with 3 GIANT shrubberies


shed after... one good power washing away from a spiffy new paint job!